Thinka for Z-Wave — FAQ
How to Install Thinka Z-Wave: A Simple Step-by-Step Guide
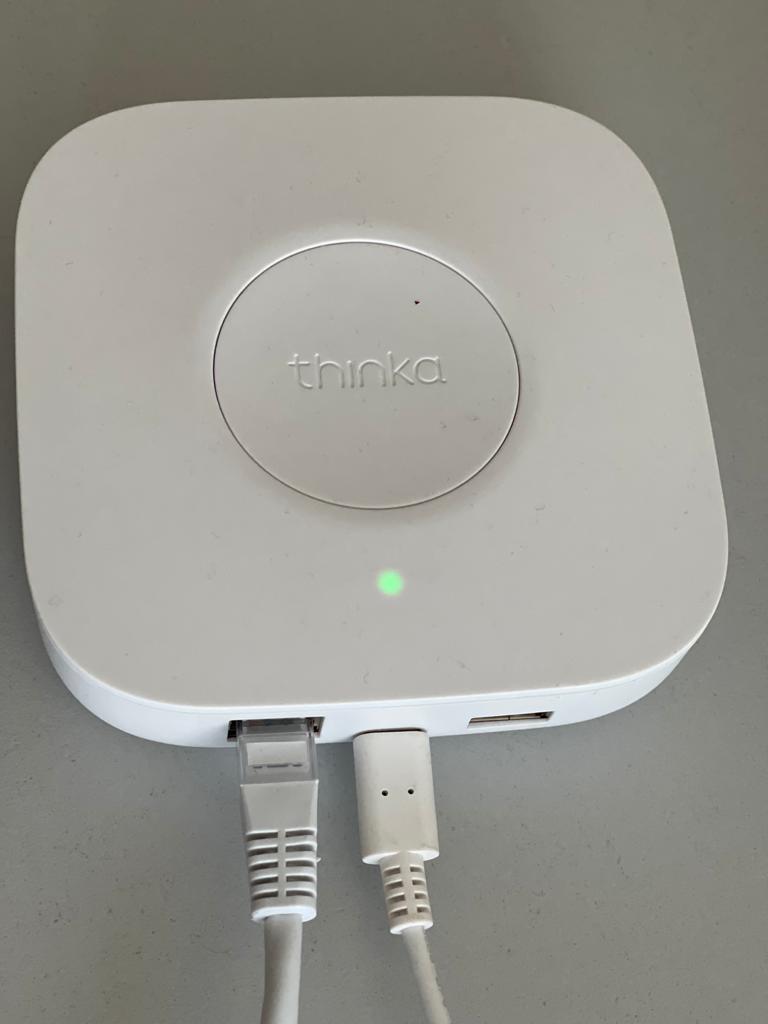
Setting up your Thinka Z-Wave is quick and easy! Follow these simple steps to get your smart home hub up and running:
- Connect the Power Adapter: Plug the power adapter into your Thinka Z-Wave device and then into a power outlet. This will power up your hub.
- Attach the Network Cable: Connect the network cable from your Thinka Z-Wave to your home router or network switch. This ensures a stable and secure internet connection for all your smart devices.
That’s it! With just these two connections, your Thinka Z-Wave is ready to bring seamless smart home automation to your fingertips.
If you need further assistance, our support team is always here to help you enjoy a smarter, more connected home!
How to Enable Local Network Access for Thinka and HomeKit
To successfully pair your Thinka device with Apple HomeKit, you’ll need to make sure Local Network access is enabled on your iOS device. Here’s a simple step-by-step guide:
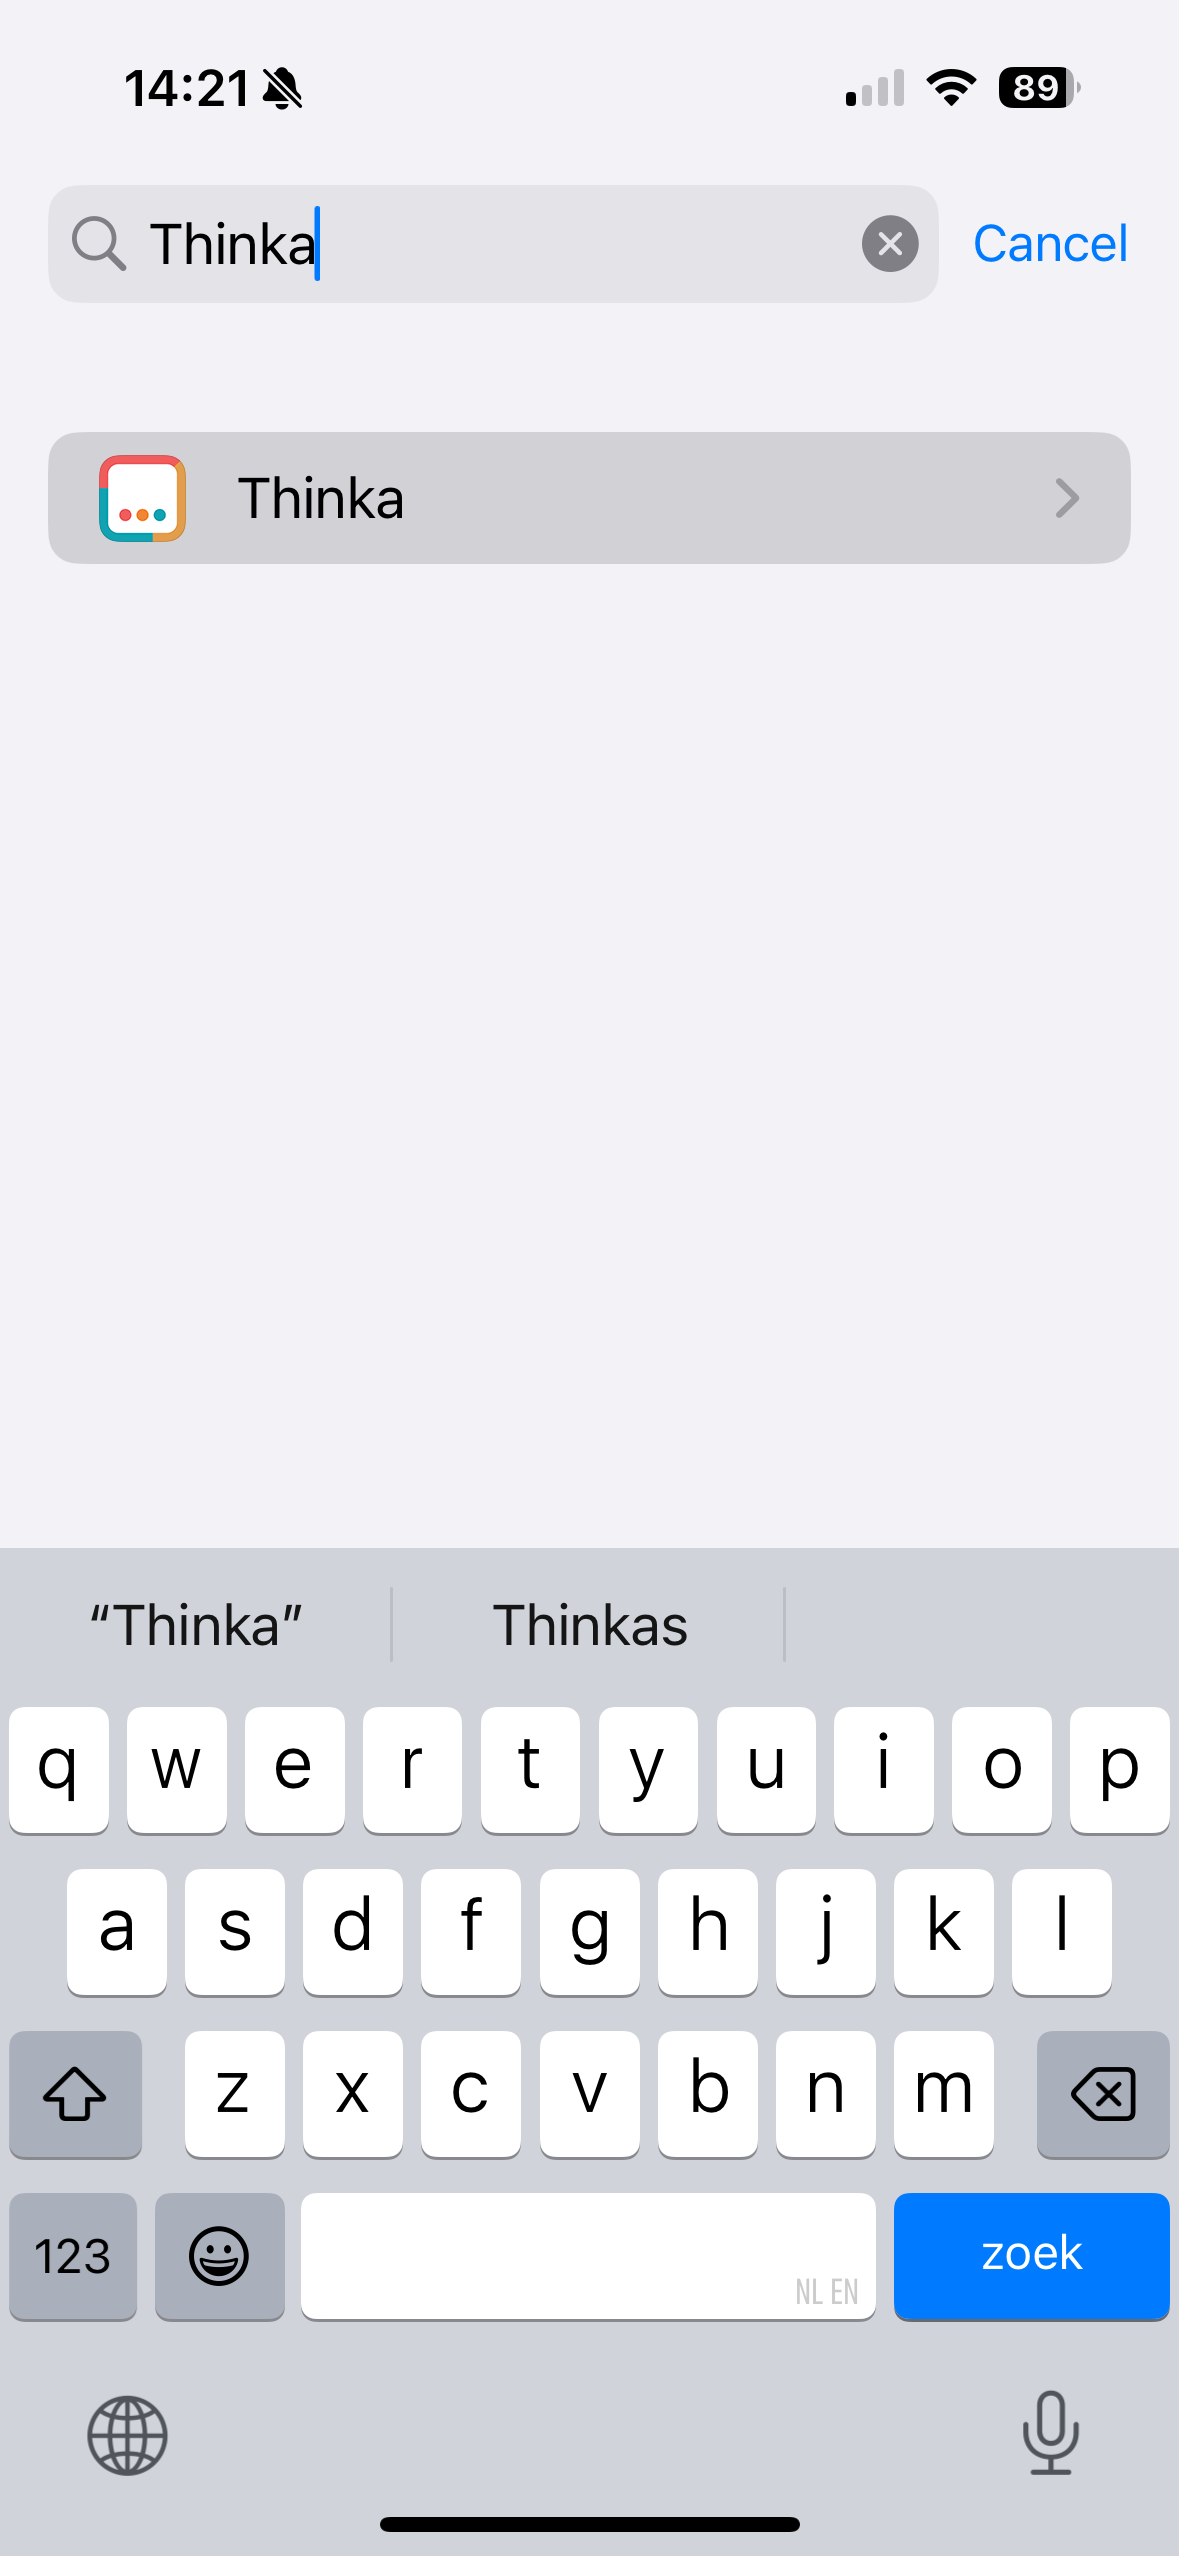
- Download the Thinka Companion app: Install the Thinka Companion app directly to your iPhone or iPad.
- Grant Local Network access: When you first open the app on iOS 14 or later, you’ll see a prompt: “Thinka would like to find and connect to devices on your local network.” Tap “OK” to allow access.
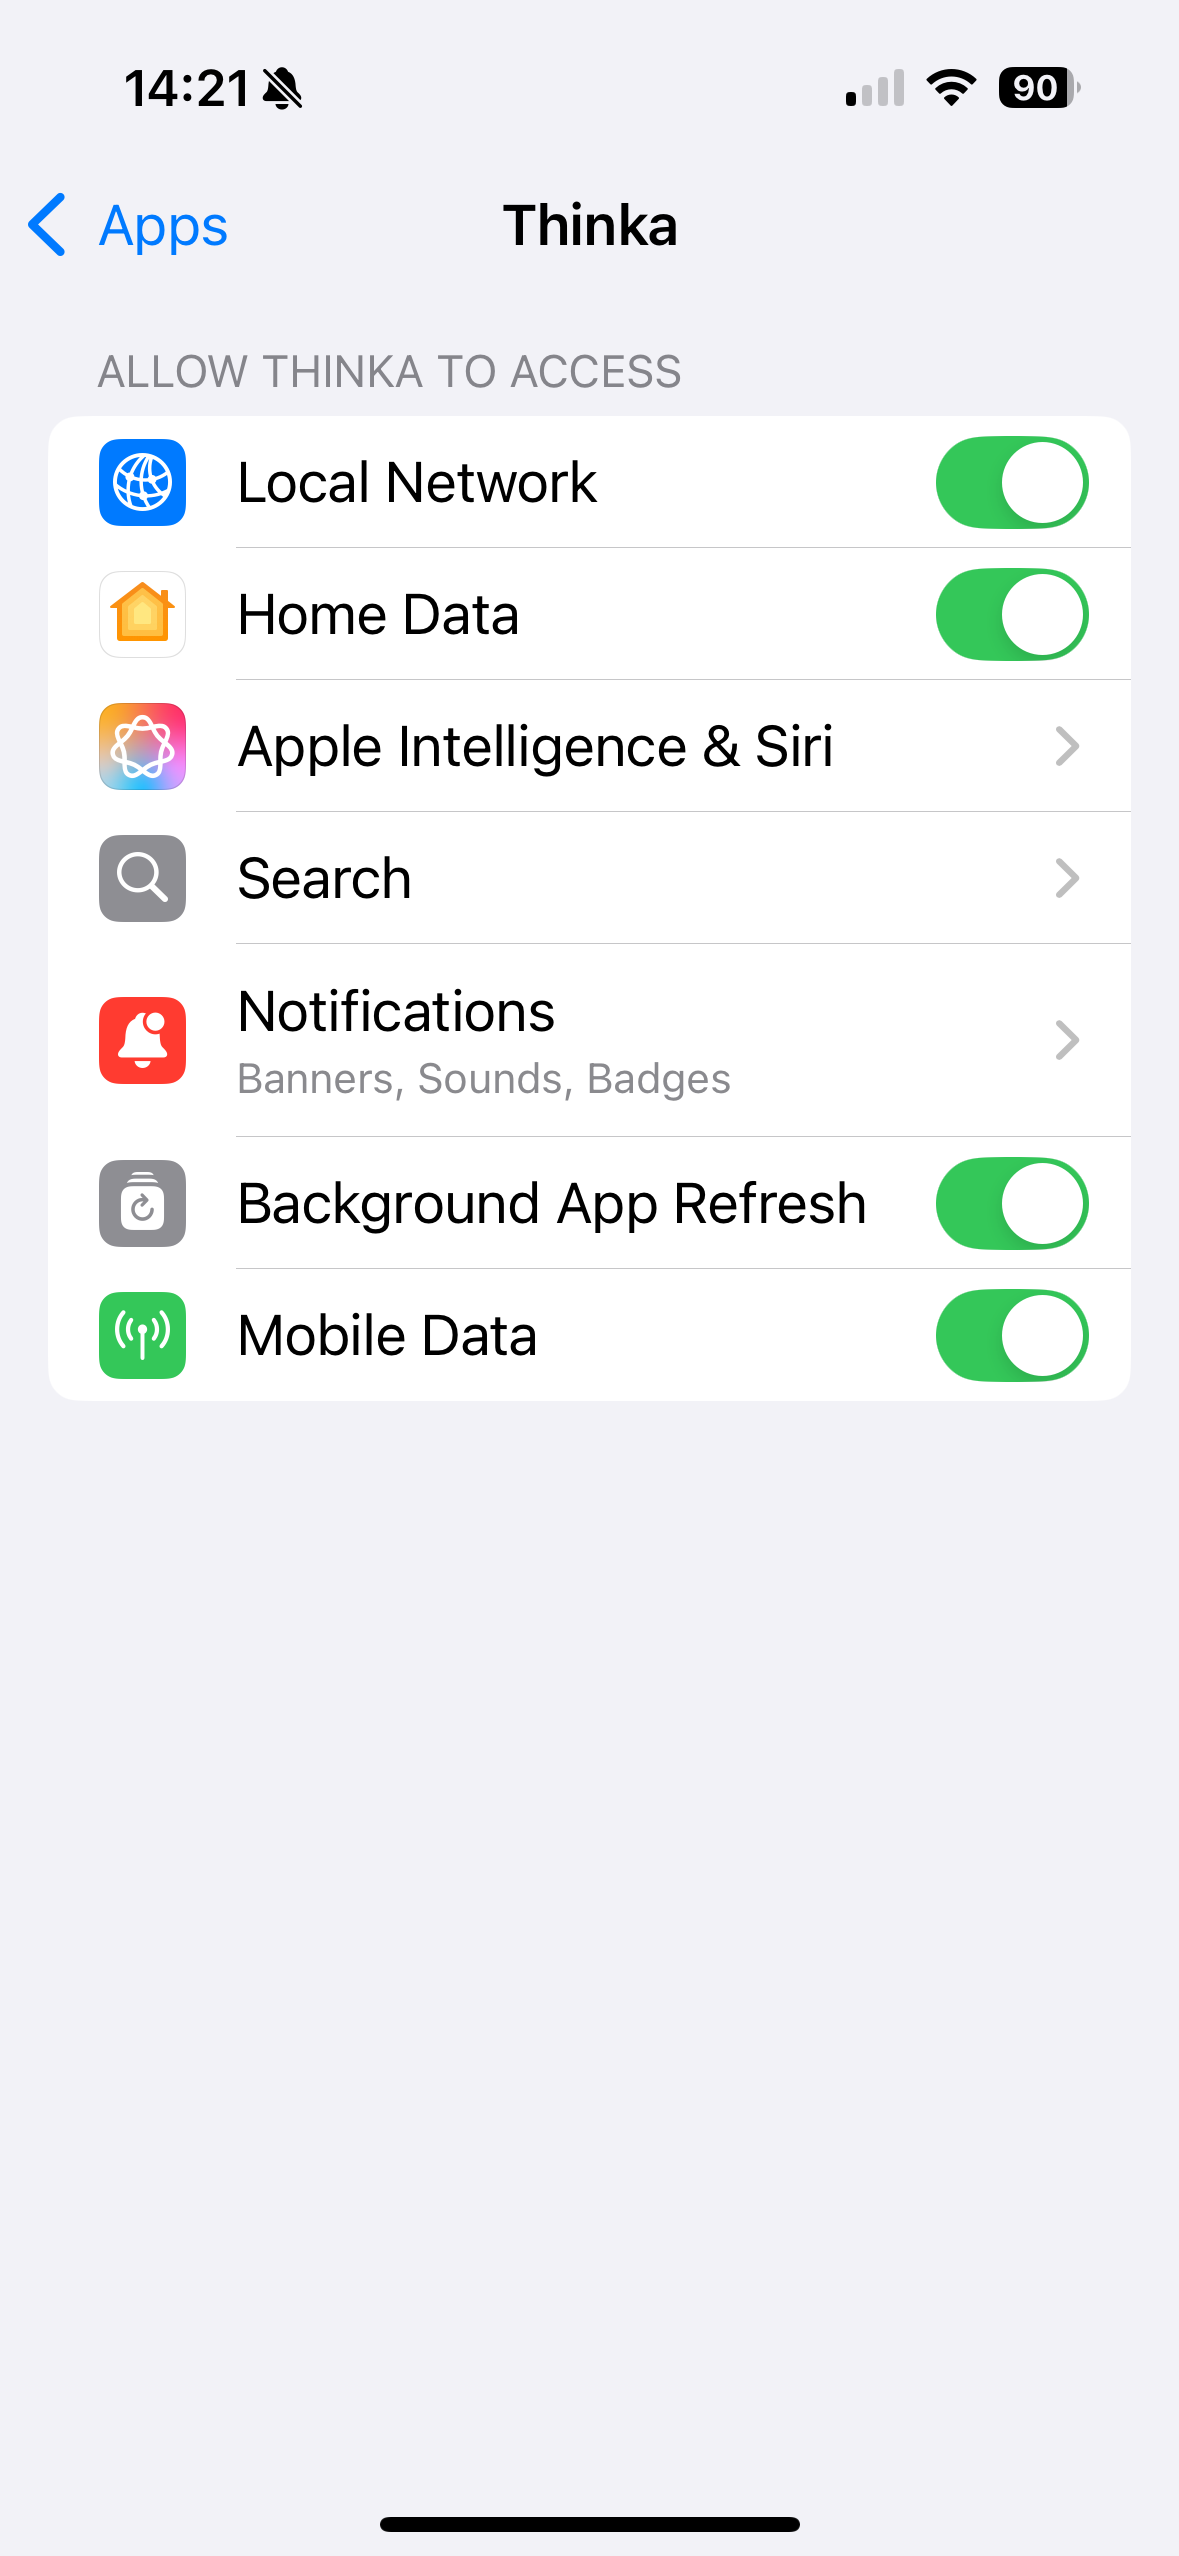
- Verify permissions: Go to your device’s Settings app to confirm that the Thinka Companion app has Local Network access enabled.
Enabling Local Network access is essential, as HomeKit pairing only works through your local network. Follow the images below for a visual guide:

Enjoy seamless smart home integration with Thinka and HomeKit!
How to Include a Regular Z-Wave Device with Thinka
Adding a Z-Wave device to your Thinka smart home hub is quick and easy! Follow these simple steps to connect your device:
- Open the Thinka web interface and click the "Add Device" button at the top of the page.
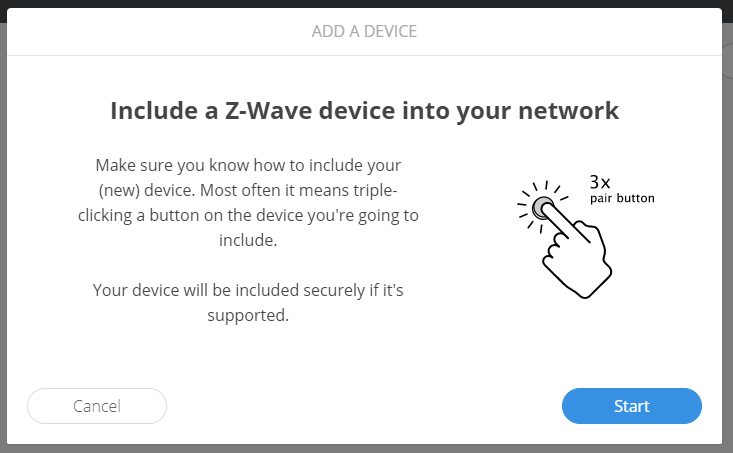
- Click the "Start" button to begin the inclusion process.
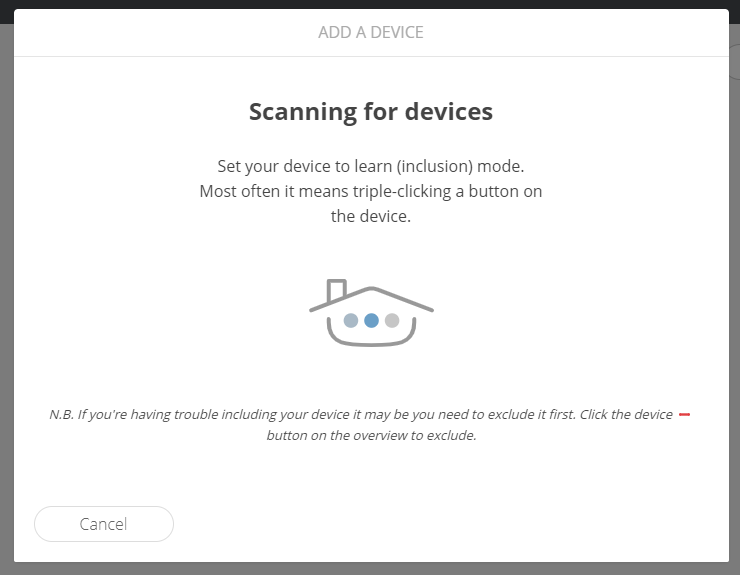
- Put your Z-Wave device into inclusion mode (refer to your device’s manual for instructions), then wait for Thinka to detect it.

- Once found, press the "Submit" button to continue.
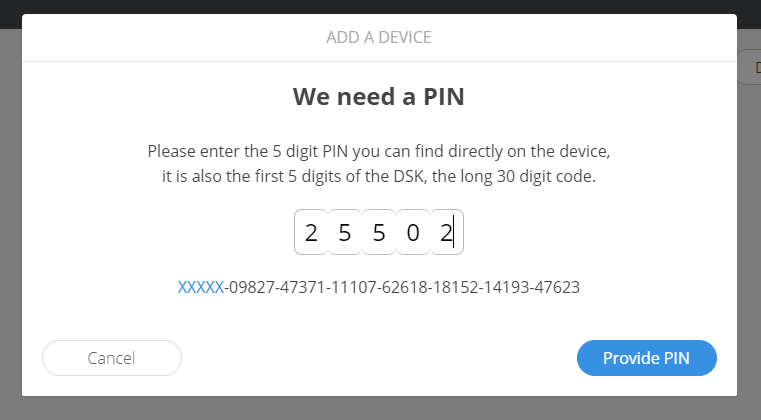
- If you’re adding a secure Z-Wave device, enter the first 5 digits of its DSK PIN when prompted.
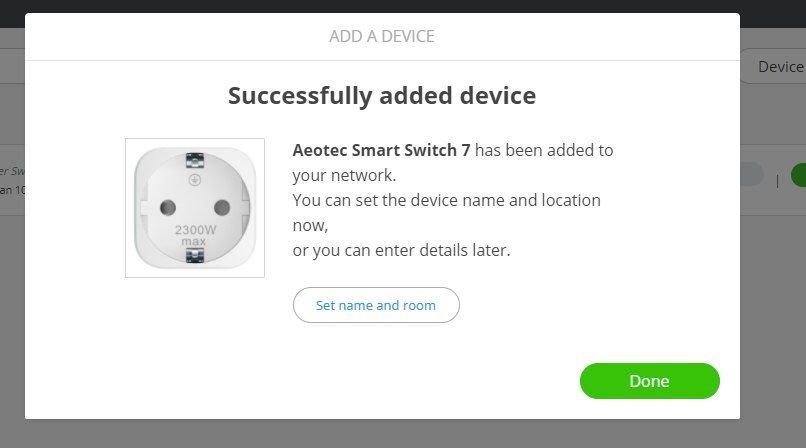
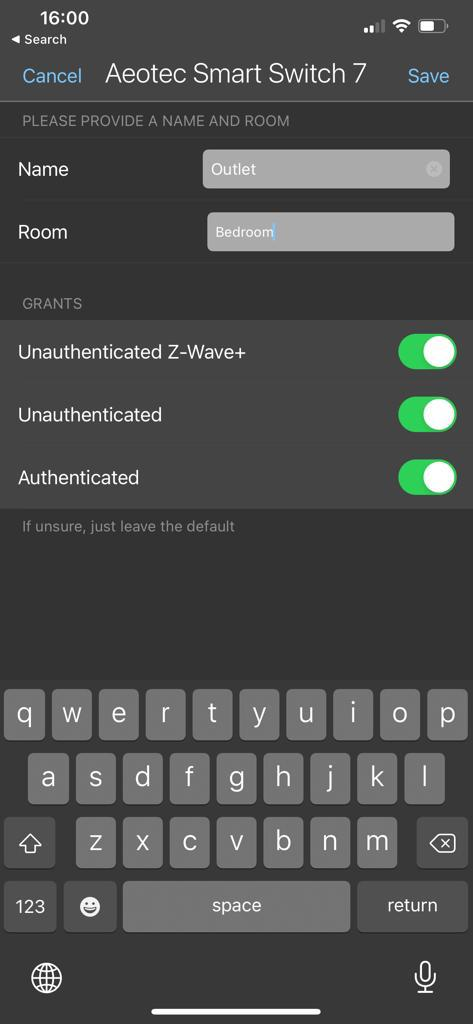
- Finish setup by naming your device and choosing a room, or click "Done" to use default settings.
Your Z-Wave device is now included and ready to use with Thinka!
Setting Up HomeKit with Your Thinka Device: A Step-by-Step Guide
How to Easily Configure HomeKit with Thinka
Ready to connect your Thinka to Apple HomeKit for seamless smart home control? Follow these simple steps to get started:
- Download the Thinka Companion App: Install the Thinka Companion app on your iOS device.
- Allow Local Network Access: When prompted, be sure to grant local network access for smooth device discovery and pairing.
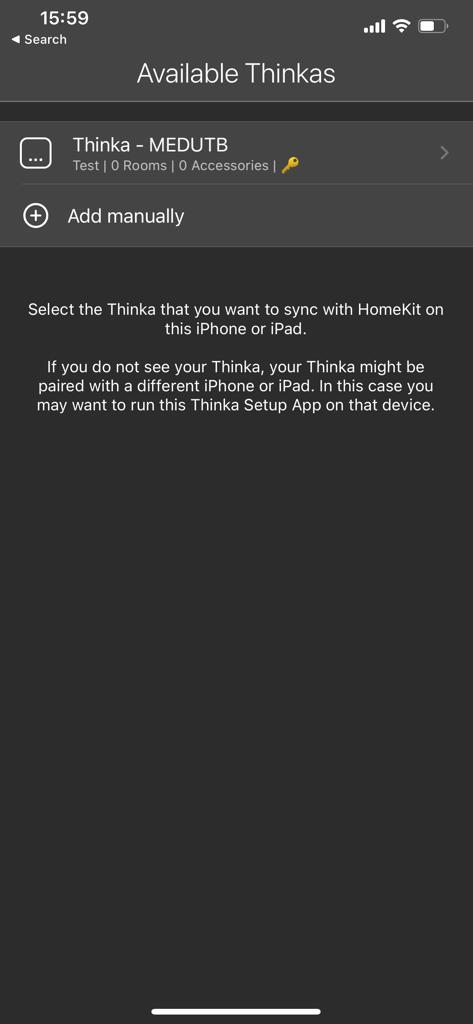
- Pair with HomeKit: Open the app to see available Thinka devices. Select your Thinka, then tap "Choose a Home" and pick your HomeKit home. Enter the PIN shown on your Thinka device.
- Set Name & Location: For your Thinka device to appear in HomeKit, ensure it has both a name and a location. You can set these during setup or via the Smart Start feature in the app.
Need help with other devices? Check our dedicated guide for Z-Wave Push Button configuration.
How to Exclude a Z-Wave Device from Your Thinka System
Need to remove a Z-Wave device from your Thinka smart home setup? Follow these simple steps to easily exclude any Z-Wave device using the Thinka web UI:
- Step 1: Open the Thinka web UI on your browser.
- Step 2: Click the Device - icon at the top of the page to start the removal process.
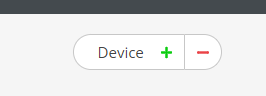
Click the "-" icon to begin removing the device.
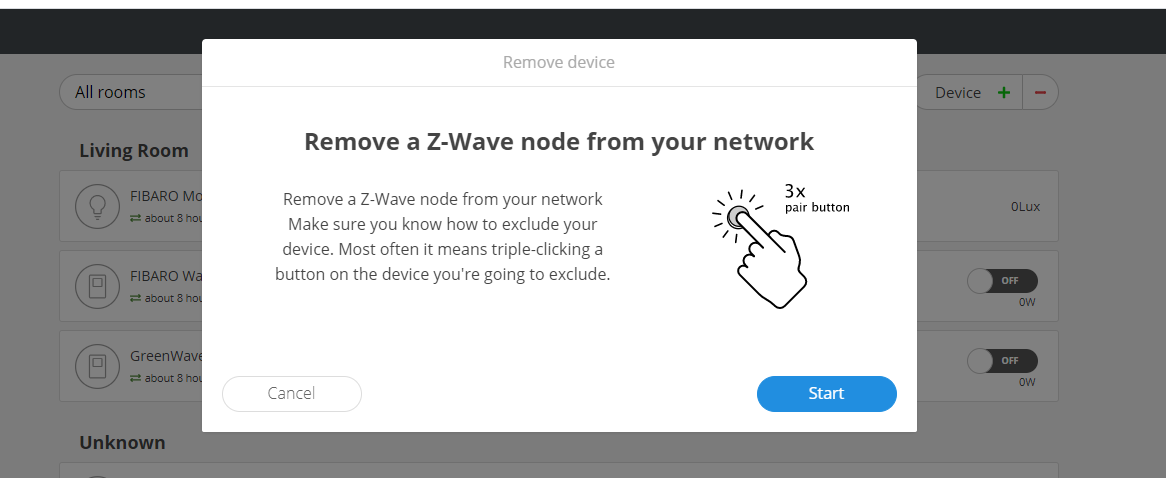
Then, click the "Start" button to initiate exclusion mode.
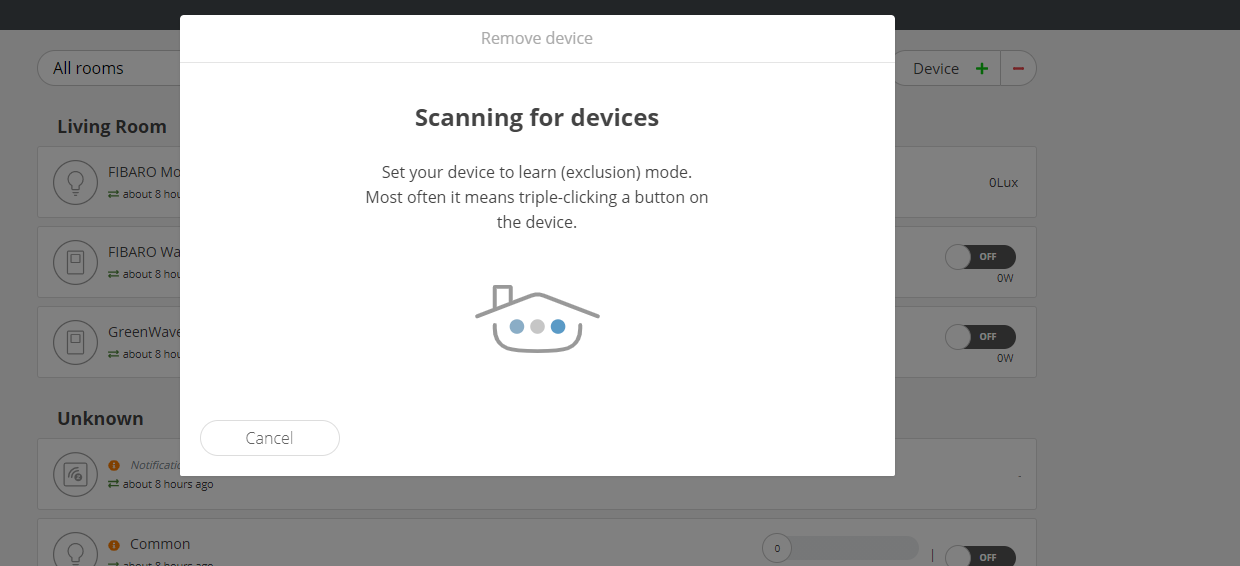
- Step 3: Put your device into exclusion (learn) mode. For most devices, simply triple-click the "B" button. Refer to your device’s manual for specific instructions.

Once completed, your Z-Wave device will be successfully removed from Thinka. If you need more details, check your device manual or our support resources!
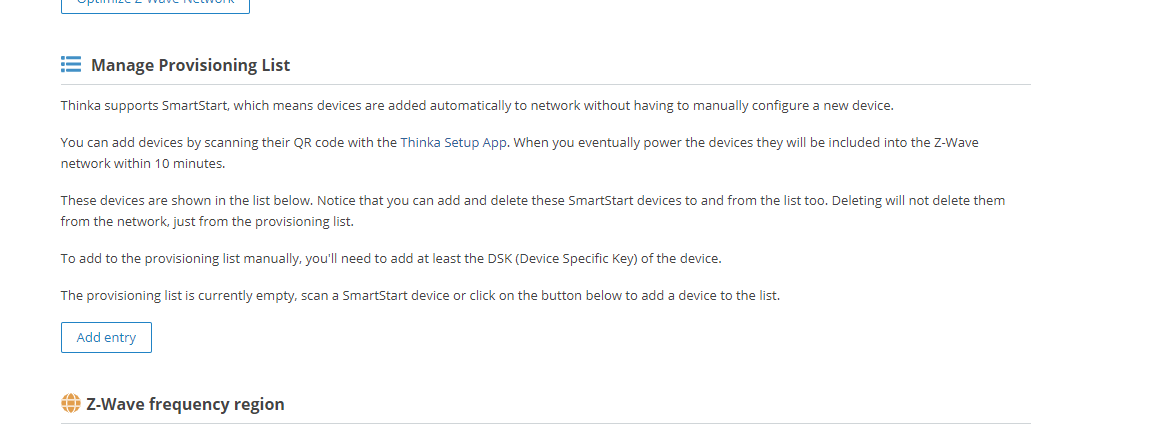
What is a Provisioning List?
The provisioning list in Thinka makes adding smart devices to your Z-Wave network quick and effortless. With SmartStart support, Thinka automatically enrolls compatible devices—no manual configuration required!
- Easy Device Enrollment: Simply scan the device's QR code using the Thinka Setup App. Power up the device, and it will automatically join your Z-Wave network within 10 minutes.
- Manage Your Devices: All added devices appear in the provisioning list below. You can easily add or remove SmartStart devices from this list. Removing a device from the list does not disconnect it from your network—it simply removes it from the provisioning list.
- Manual Additions: Want to add a device manually? Just enter the DSK (Device Specific Key) to include it in the provisioning list.
If your provisioning list is empty, just scan a SmartStart device or use the button below to add a device.
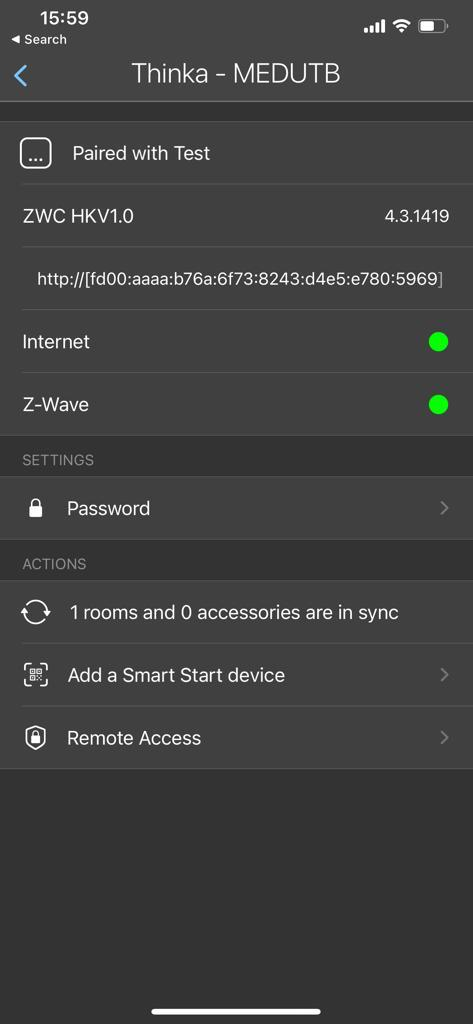
Access your provisioning list by navigating to "Settings" → "Z-Wave" in the Thinka web app. See the screenshot below for reference:
Is Thinka Secure?
Your security and privacy are our top priorities at Thinka. Our smart home hub is built with advanced security measures to keep your data and home safe at all times.
- Robust Data Protection: Thinka uses cutting-edge encryption and security protocols to safeguard your personal information and smart home activity.
- Privacy by Design: We have engineered Thinka to ensure your data stays private and is never shared without your consent.
- Local Installation: Wondering about cloud storage? Discover more about our secure, local installation process in our detailed FAQ.
- Industry Recognition: Learn how security and data protection are fundamental to Thinka by reading our in-depth article in the news section and our featured interview on KNX Today.
Choose Thinka for a smart home hub that puts your safety first. Explore our resources to see how we protect your smart home every step of the way.
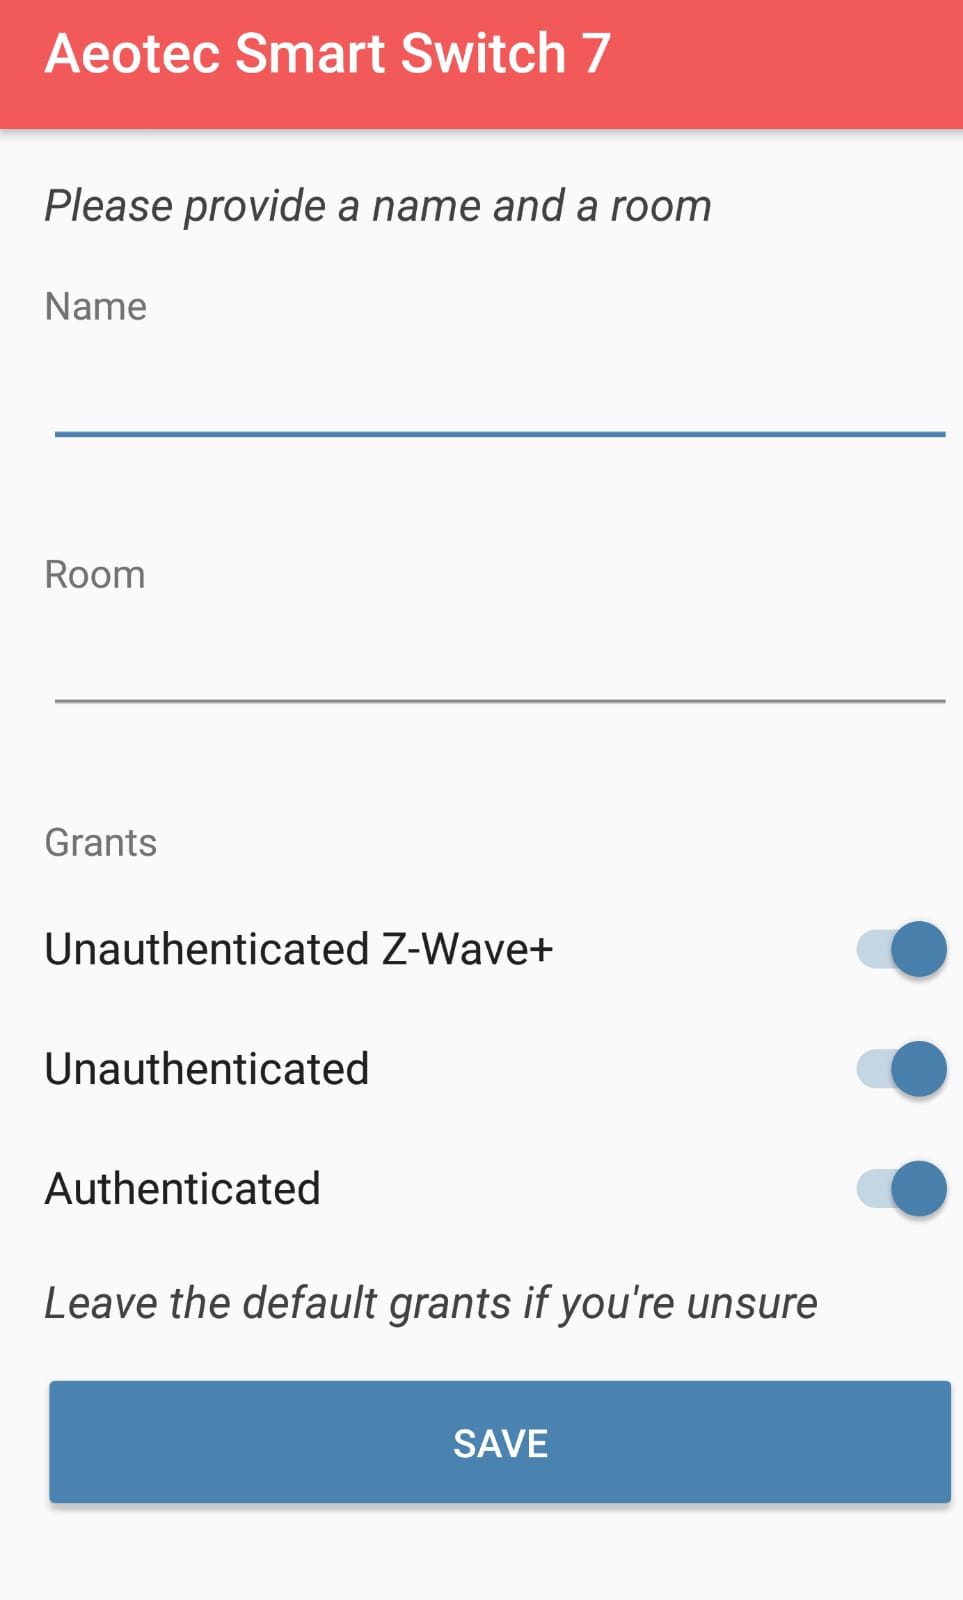
How to Easily Include a SmartStart Z-Wave Device
Adding your SmartStart Z-Wave device is quick and effortless! If your device supports SmartStart, simply look for the QR code on the box or the device itself. To get started, download the Thinka Setup app from the App Store or the Google Play Store for Android.
Once installed, open the app, select your Thinka hub, and enter your password if prompted. Then, follow the steps below for your device:
For Android Devices
- Tap the QR scan icon in the app.
- Scan the QR code found on your device or its packaging.
- Name your device and assign it to a room for easy management.
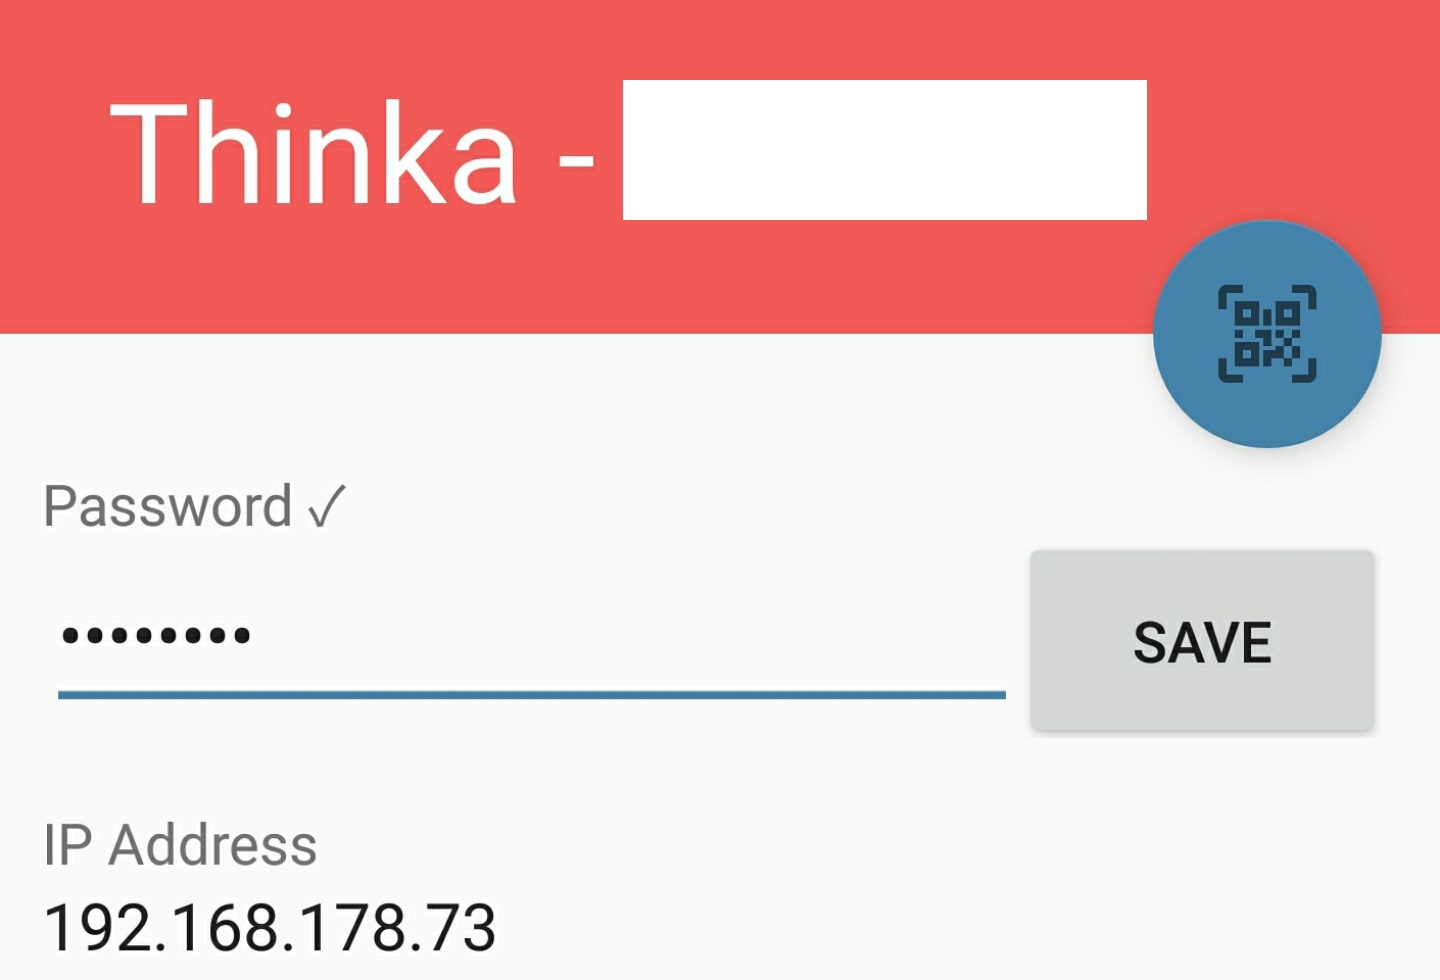
For iOS Devices
- Select "Add a SmartStart device" in the app.
- Scan the QR code on the box or device.
- Name your device and choose a room.
Enjoy seamless Z-Wave integration with Thinka’s SmartStart feature!
How to Easily Configure Your Z-Wave Device
Configuring your Z-Wave device is simple and user-friendly. Just follow these steps to get started:
- Access the Configuration Page: Click on your desired Z-Wave device to open its configuration page.
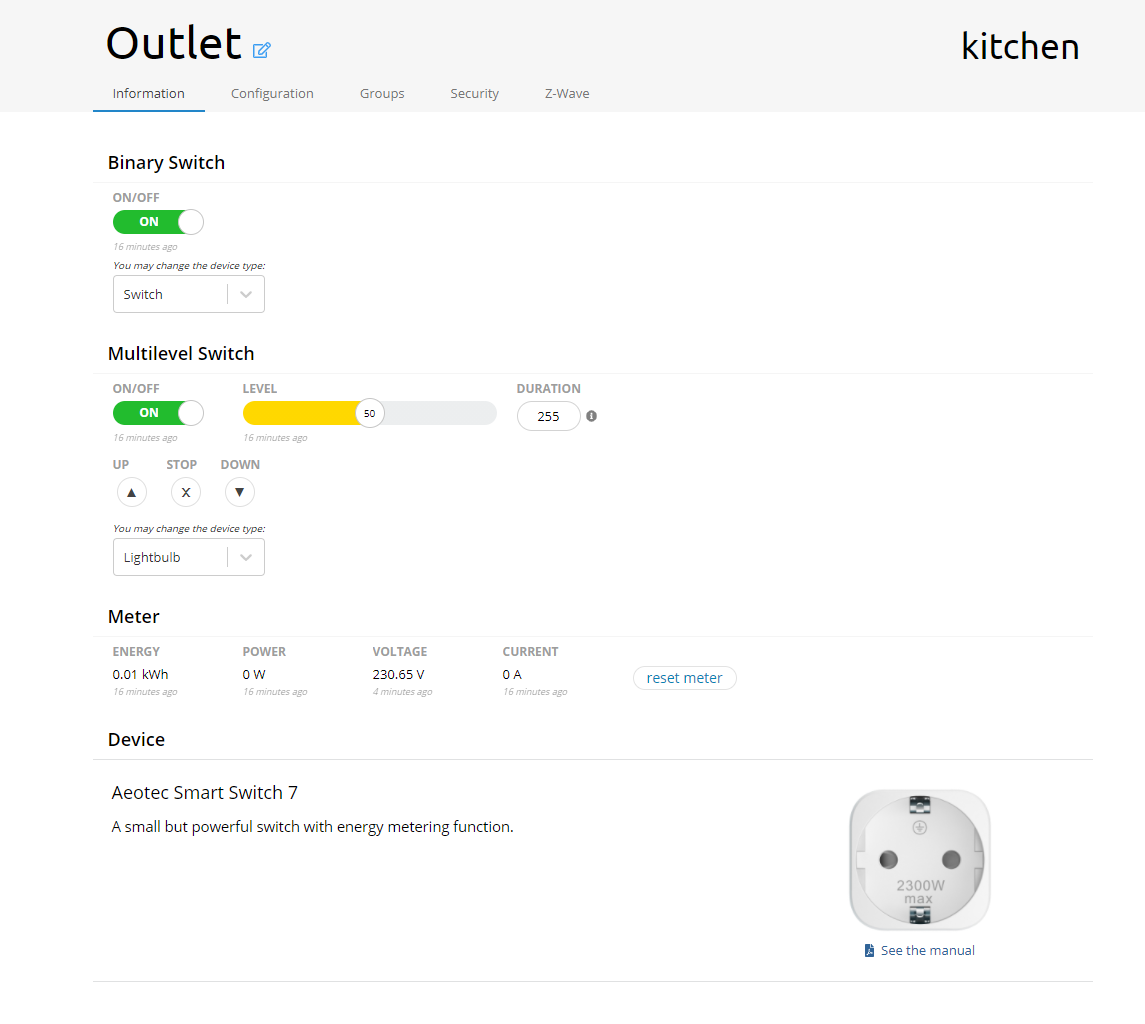
- Information Tab: Here, you'll find essential details about your device. Monitor everything from metering values to notifications, and control your device easily using command classes.
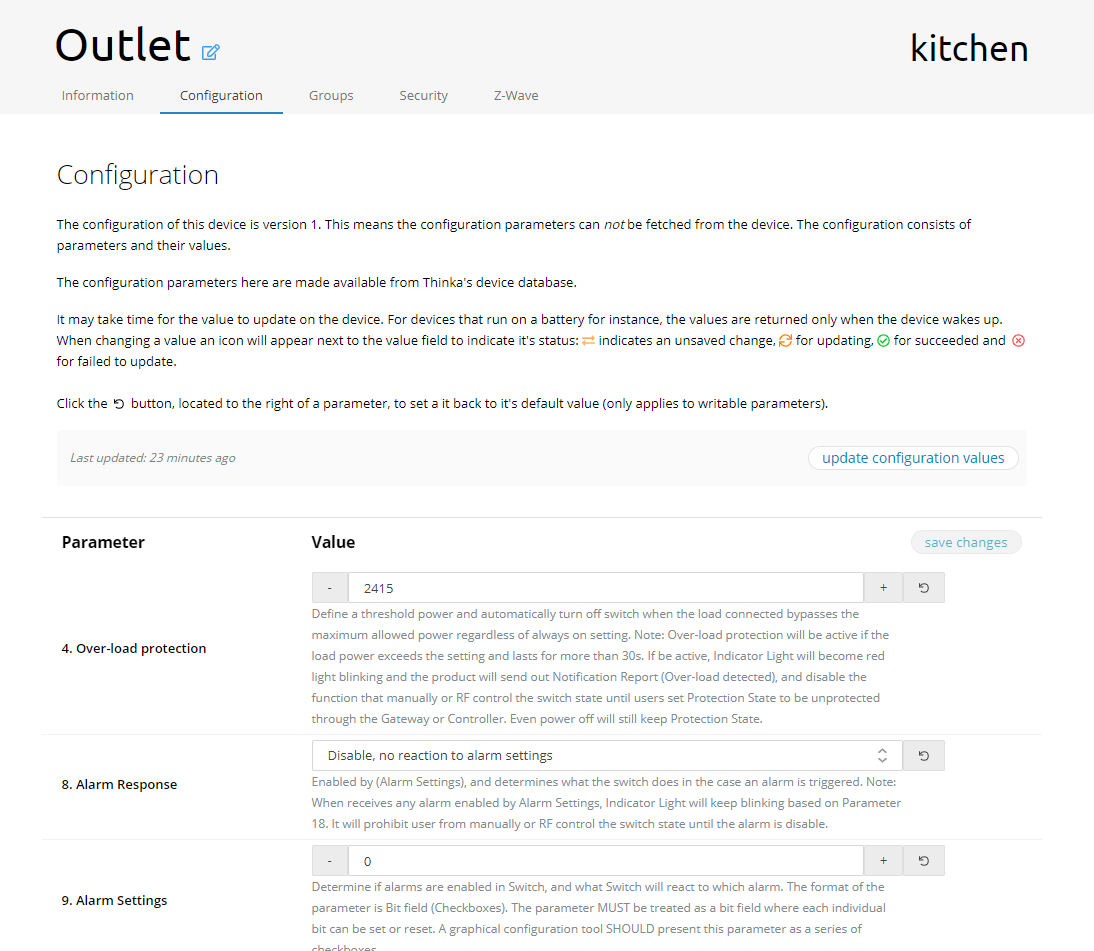
- Configuration Tab: Set and customize device parameters to suit your needs. Don’t forget to click “Save Changes” after updating your settings.
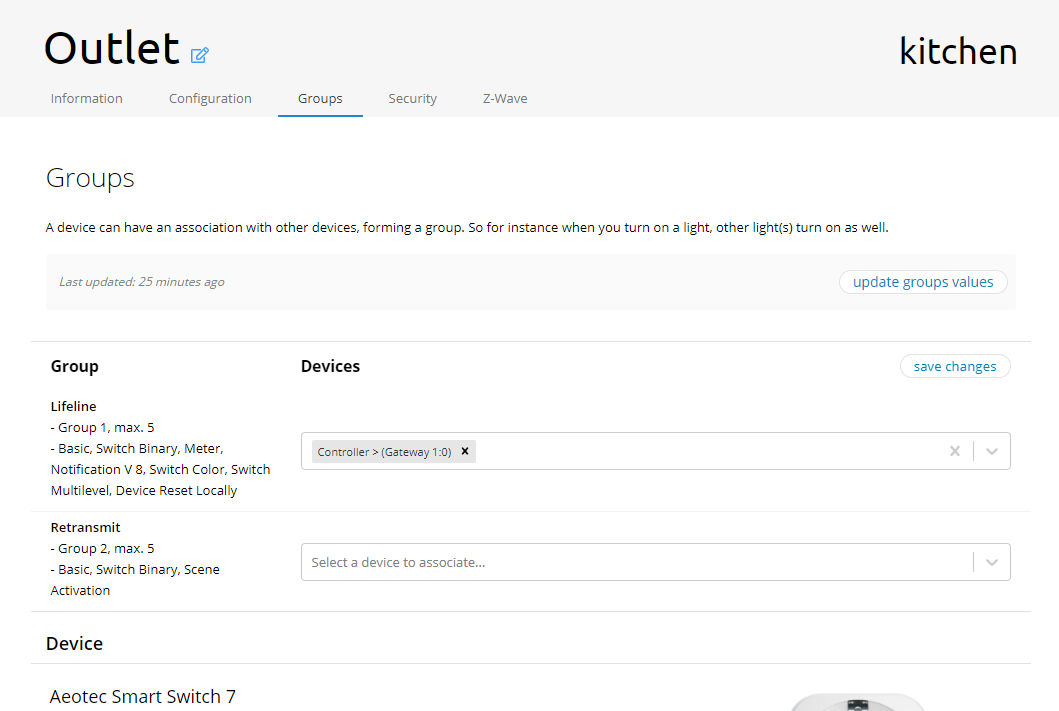
- Association Tab: Easily view and associate your device with other Z-Wave groups. Click “Save Changes” to apply your associations.
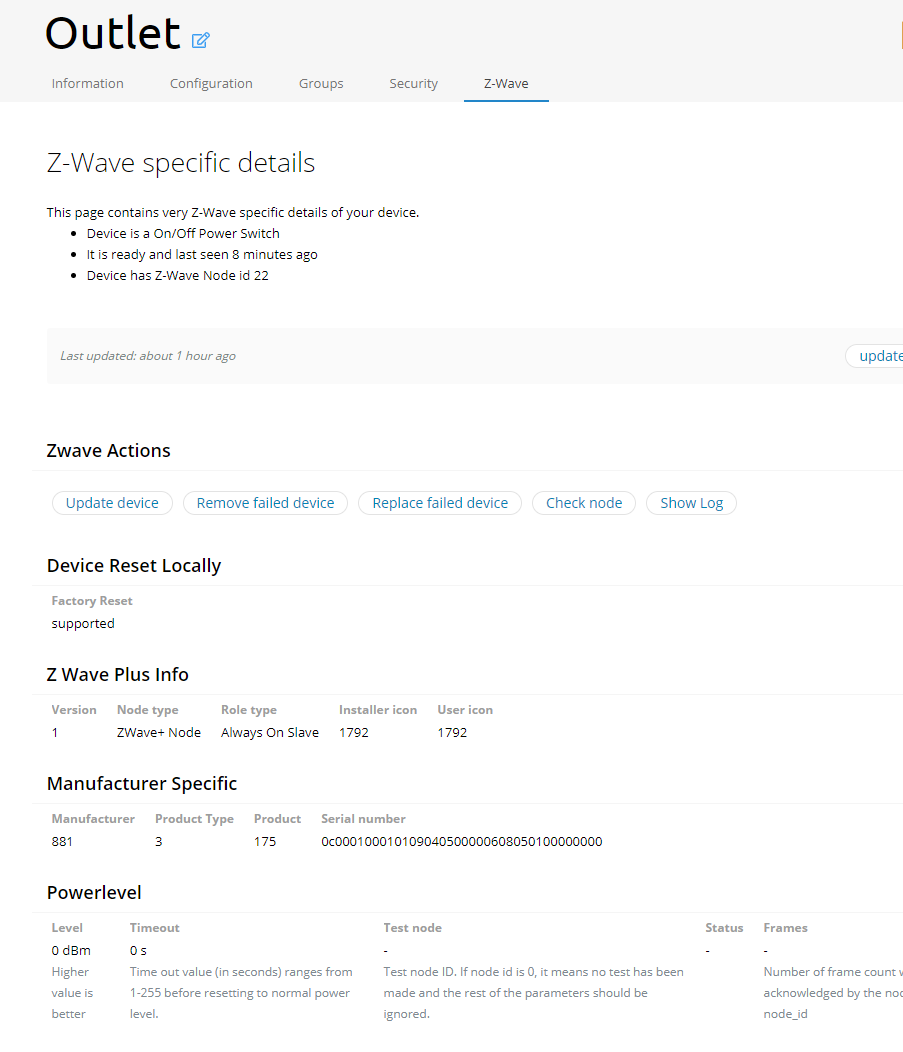
- Advanced Options: In the final tab, you can:
- Update device: Refresh device data for optimal performance.
- Remove failed device: Easily remove devices that are no longer responsive.
- Check node: Verify if your device is active and connected.
With these simple steps, managing your Z-Wave device is quick, efficient, and hassle-free!
How to Enable Matter Support on Your Thinka Device
Unlock the future of smart home connectivity with Matter Support on your Thinka device! Matter is currently available through our Beta channel, making your home even smarter and more compatible with leading platforms.
- Step 1: Send an email to support@thinka.eu and request Beta access for your Thinka device.
- Step 2: Our Thinka team will promptly move your device to the Beta channel so you can enjoy enhanced features and Matter compatibility.
- Step 3: Once notified, simply power-cycle your Thinka device (switch it off and back on) to activate Matter Support.
Enjoy seamless integration and improved performance by enabling Matter Support today. If you have any questions or need assistance, our support team is always here to help!